How to Grow Maggots at Home for Fishing: Complete Bait Larvae Guide
 libre
libre
How to Grow Maggots for Fishing
Maggots are grown by exposing fish or meat to flies, letting the flies lay eggs, and harvesting the larvae a few days later. Maggots — the larvae of blowflies and the common house fly — are one of the most effective baits for roach and other coarse fish in summer on rivers and ponds. Producing them at home is not a pleasant job, but many anglers do it because the reward is a reliable, lively bait that fish find hard to resist. This guide covers the whole process: choosing a substrate, attracting flies, harvesting clean larvae, storing them, and rigging them for the catch.

The term "maggot" itself replaced the older British angling word "gentles," which is what early fishing writers called these larvae for centuries before the modern name took hold. The word change reflects how deeply rooted maggots are in fishing tradition, a tradition documented as far back as the fifteenth century.
Why Maggots Make Excellent Fishing Bait
Maggots work as bait because they are soft, lively, and naturally attractive to fish that feed on insects and grubs. A fresh, just-grown maggot is hard, elastic and mobile — easy to put on the hook and constantly wriggling, which draws fish in. They suit a huge range of fishing situations, from light float work for small silverfish to heavier rigs for bigger specimens, and they can be used singly, in pairs, or in bunches depending on the target.
Maggots have been used as bait for at least 500 years. Dame Juliana Berners described "gentles" in the Treatise of Fishing with an Angle (1496), and Izaak Walton wrote about them in his angling classic two centuries later. In the UK, large commercial maggot farms once supplied tackle shops across the East of England, and maggots were even sold through vending machines at some fisheries — though the number of traditional UK maggot farms has declined sharply in recent decades.
Fish Species That Take Maggot Bait
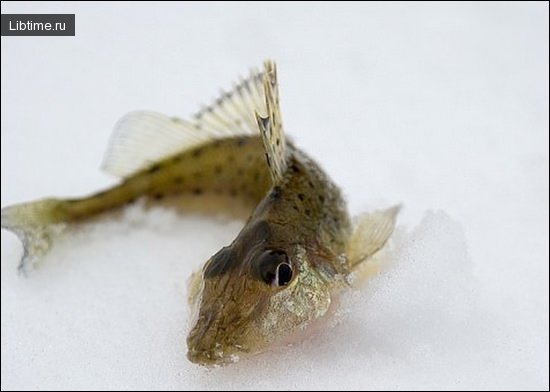
Maggots tempt nearly every freshwater coarse fish, which is why they are the default bait on so many waters. Roach in particular feed on maggots readily through the warmer months, and they are far from alone:
- Roach — the classic maggot target on rivers and ponds.
- Other coarse fish — bream, rudd, perch, chub, dace, and tench all take maggots.
- Panfish and crappie — North American anglers, including those on forums like crappie.com, use maggots and similar larvae for panfish.
- Larger maggots — bigger larvae from blowflies suit larger fish and rougher conditions.
UK venues such as Dayhouse Farm Fishery, Docklow Fishing Holidays, and the Evesham & Hampton Ferry stretch are typical of the mixed coarse fisheries where maggot bait dominates the bank.
Types of Fly Larvae and Which Are Best
The best maggots for fishing come from the blue meat fly (bluebottle), whose larvae grow large and tough. Different flies produce different-sized larvae, and the species that lays eggs on your bait determines the size and quality you end up with:
- Bluebottle fly (blowfly) — produces larvae up to about 1 cm long and thick. These large maggots are the best all-round bait.
- House fly — produces small larvae, useful for fine fishing and small fish but less robust on the hook.
Fly larvae look like whitish worms with a pointed front end and a blunt rear end. Selecting the right fly to lay on your substrate — by leaving it out where blowflies are active — is the simplest way to maximise maggot size.
What You Need to Start Breeding Maggots
To breed maggots you need a substrate for the flies to lay on, a container to develop and store the larvae, and a sheltered outdoor spot. The setup is cheap and minimal, but a little care with equipment keeps the smell down and the larvae clean.
Container and Equipment Setup
A low, wide-necked jar with a screw cap is the core piece of kit for finished maggots, but you need a few other items for the whole process. Assemble the following before you start:
- Fish or meat as the breeding substrate.
- Paper and string for wrapping the baited substrate.
- A sheltered, shaded spot to hang the parcel.
- A low jar with a wide neck and screw cap, or a cardboard box, for the harvested larvae.
- A small quantity of flour or bran to line the storage container.
- A thin ray, twig, or tool for lifting larvae out cleanly.
Some keen breeders scale this up into a two-bucket gravity system, where larvae crawl out of a holed upper bucket as they ripen and drop into a clean lower bucket of bran — a self-harvesting setup that keeps handling and odour to a minimum.
Choosing a Breeding Substrate
The substrate is the meat or fish on which flies lay their eggs and the larvae feed. The choice of substrate affects how fast the maggots grow, how large they get, and how unpleasant the process smells. Small fish, specially caught or picked out of an ordinary catch, are the traditional starting point, but several alternatives work well.
Raw Fish Method
Raw fish is the simplest substrate but also the foulest to work with. It spoils very quickly and gives off a genuinely disgusting odour, which makes picking the larvae out of it an extremely unpleasant operation. After cooking or simply laying out small fish on paper, leave them in the shade where flies can reach them. To control where the flies lay and to slow drying, keep the fish moist by sprinkling it with water.
Boiled Fish and Meat Method
Boiled fish or pieces of meat are a slightly less offensive alternative to raw fish. Spread the cooked fish or meat on paper and leave it in plain sight in a shaded spot. Flies arrive almost immediately and lay oblong white eggs in larger or smaller clusters. If only a few clutches appear, leave the substrate open longer, moistening it so it does not dry out before enough eggs are laid.
Beef Heart and Liver Substrate
Beef hearts and liver are a popular modern breeding substrate because they are dense, slow to disintegrate, and produce large, well-fed maggots. Anglers who breed their own bait often favour beef hearts over fish for exactly this reason — the firm muscle holds together as the larvae feed, giving cleaner harvesting than a fish that has turned to mush. Herring frames (the picked-over skeletons of herring) are another favoured alternative, cheap to obtain and very attractive to blowflies.
Step-by-Step: Growing Maggots at Home
Growing maggots follows a short, predictable cycle: bait the substrate, let flies lay, develop the larvae, then harvest them. From egg-laying to ready maggots takes around four days in hot weather and longer when it is cool. The steps below walk through the whole sequence.
Attracting Flies and Egg Laying
Flies are attracted by laying the substrate out in the open, in the shade, until eggs appear. Place cooked small fish or meat on paper somewhere shaded and leave it in plain sight. Flies will find it almost at once and deposit oblong white eggs in clusters of varying size. Keep the substrate damp so it does not dry out, and wait until a good number of egg clutches have been laid before moving to the next stage.
Larvae Development Timeline
Once enough eggs are laid, wrap the substrate and let the larvae develop over about four days. Wrap the fish or meat in paper, tie it with string, and hang the parcel somewhere sheltered. Larvae develop very quickly from the laid eggs:
- Hot weather — maggots are usually ready after about four days.
- Cool weather — development takes noticeably longer.
For the largest bait, let the larvae feed until they reach full size but harvest before they stop feeding and begin to ripen, because once they enter the pre-pupal stage they shrink, harden, and eventually turn into pupae from which flies emerge.
Harvesting and Cleaning the Maggots
Harvest maggots by carefully lifting the developed larvae from the substrate with a thin ray and transferring them to a clean container. Pick the larvae out of the fish or meat and place them in a low, wide-necked jar holding a small layer of flour, then close the screw cap; a cardboard box also works. The flour or bran cleans the maggots, absorbs moisture, and soaks up odour. Sieving the larvae through a coarse mesh or sorting them by size as you go gives you graded, cleaner bait ready for the hook.
Biosecurity and Bacterial Contamination Risks
Home maggot breeding carries a real risk of bacterial contamination, so hygiene matters. Decaying fish and meat are an ideal breeding ground for harmful bacteria, and maggots raised on them can carry pathogens. Take these precautions seriously:
- Salmonella and Clostridium — rotting meat substrates can harbour these bacteria, including the organisms behind food poisoning and, in rare cases, botulism.
- Wash hands thoroughly after handling larvae, substrate, or containers.
- Keep breeding well away from food preparation areas and drinking water.
- Clean maggots in fresh bran or flour before use to purge their guts and reduce surface contamination.
- Dispose of spent substrate carefully and never reuse foul, fly-blown material near the home.
These same risks are why commercial maggot production is tightly regulated and why casual backyard breeding should always be done with care and basic safety protocols in mind.
Storing and Preserving Your Maggots
Maggots are best stored cold, in flour or bran, to slow their development and keep them firm. Fresh, just-grown maggots make the best bait — hard, elastic, and mobile — so the goal of storage is to hold them in that lively state for as long as possible before they pupate.
Cold Storage Methods
Keeping maggots cold is the single most important storage measure. Store the container of maggots in the cold — a refrigerator is ideal — with a small layer of flour or bran to keep them dry and clean. When kept in the heat, the larvae quickly turn into immobile pupae, from which flies eventually emerge, ruining them as bait. A steady low temperature slows their metabolism and extends their useful life by days or even weeks.
Keeping Maggots Dormant and Preventing Pupation
Cold storage holds maggots in a near-dormant state and delays pupation, preserving them as bait. The colder they are kept (without freezing), the slower they develop and the longer they stay in the firm, mobile larval stage anglers want. Managing moisture is part of this: the flour or bran in the container should keep the maggots dry, since excess damp encourages both early pupation and bacterial spoilage. Check stored maggots regularly and remove any that have hardened into pupae (often called "casters"), which themselves can be used as a separate bait.
Using Maggots for Fishing
Maggots are fished on a fine hook, presented singly or in bunches, often under a float for coarse fish. A fresh, lively maggot is easy to hook and its movement attracts fish on its own. How you rig and present it depends on the species and the conditions.
How to Hook a Maggot
Hook a maggot by nicking the hook point through the thick blunt end, leaving the body free to wriggle. The blunt rear end has a tougher skin that holds the hook without bursting the larva. Common presentations include:
- Single maggot — one larva on a small hook for shy or small fish.
- Paired or bunched maggots — two or more on a larger hook for bigger fish or to add bulk and scent.
- Hook size — fine-wire hooks in small sizes suit single maggots; step up the size for bunches and larger maggots.
A floating maggot technique — inflating the larva slightly or using a buoyant grub — can lift the bait off the bottom over soft silt or weed.
Fishing Rig Types for Maggots
Maggots are fished on several rigs depending on water depth, flow, and target species. The most common setups are:
- Float rig — a waggler or stick float with small shot strung down the line; ideal for roach and other coarse fish feeding in mid-water.
- Paternoster rig — a fixed dropper above a weight, presenting the maggot at a set height off the bottom.
- Leger / weight rig — a small sinker to hold the bait on the bottom in flowing or deeper water.
Match the weight and sinker to the flow: just enough shot to cock the float in still water, more in a current. Light braids and leaders such as the Platypus Pulse X4 and Pulse X8, the Bionic X9 Braid, or Hard Armour supple and tough leaders give a sensitive, low-visibility connection to small hooks.
Preparing a Burley Mix with Maggots
A burley (groundbait) mix laced with maggots draws fish into your swim and holds them there. Combine a base of bran or pollard with a few loose maggots and just enough water to bind it into balls you can throw or cup into the swim. The wriggling larvae in the mix imitate natural feeding activity and pull fish up the line toward your hooked bait. Loose-feeding a few maggots by hand alongside the burley keeps fish competing without overfeeding them.
Cost-Effectiveness of Backyard Maggot Farming
Breeding your own maggots is cheaper than buying them, but it costs time and effort and is far from pleasant. The substrate — scrap fish, herring frames, or cheap offcuts of meat — costs little or nothing, and a single parcel can yield hundreds of larvae for the price of some paper and flour. Weigh that against the realities:
- Savings — repeated tackle-shop maggot purchases add up over a season; home breeding all but eliminates that cost.
- Effort and smell — the process is genuinely unpleasant, and raw fish in particular produces a foul odour.
- Reliability — buying maggots guarantees clean, graded bait on demand, which home breeding cannot always match.
- Volume — for occasional anglers, buying a pint of maggots is easier; for frequent or high-volume fishing, breeding pays off.
For anglers who fish often and don't mind the work, backyard maggot farming is a sound, low-cost way to keep a steady supply of fresh bait. For more bait, tackle, and outdoor guides, browse our Fishing section.