How to Grow Potatoes at Home: A Beginner's Guide to Potato Cultivation
 libre
libre
Planting potatoes in grow bags lets you grow a full crop of potatoes in a patio, balcony, or tiny backyard without a traditional vegetable plot. A grow bag is a fabric or heavy-duty plastic container that you fill in layers, hill up as the plants grow, and tip out at harvest. This guide walks through every stage — choosing varieties, chitting seed potatoes, filling and siting the bag, watering, feeding, managing pests, and harvesting — so a complete beginner can get a reliable yield from a single bag.

Planting Potatoes in Bags: Complete Guide
Growing potatoes in a bag follows a simple sequence that anyone can repeat on a balcony or in a small garden. Start with certified seed potatoes, sprout them, plant them shallow in a partly filled bag, add more soil as the shoots rise, water consistently, and harvest when the foliage dies back. The whole cycle runs roughly 70 to 120 days depending on the variety, and a single large bag typically returns 2 to 3 kg of tubers.
The short version of the method, before the detail, is this:
- Chit (pre-sprout) seed potatoes for 3 to 6 weeks until short green shoots form.
- Fill the bag with about 10–15 cm of free-draining potting mix.
- Place 2 to 4 seed potatoes on top, sprouts facing up, and cover with 8–10 cm of soil.
- As shoots reach 15–20 cm, bury the lower two-thirds with more soil — this is "hilling" or "earthing up."
- Keep the mix evenly moist and feed every two weeks once flowering starts.
- Harvest new potatoes after flowering, or wait for the foliage to yellow for a main crop.
Advantages of Grow Bags Over Other Containers
Grow bags give better drainage and root aeration than rigid pots, and they make harvesting almost effortless because you simply tip or roll the bag over. Fabric grow bags such as the Gardener's Best Potato Grow Bag, the larger Gardener's Best Jumbo Potato Grow Bag, and Root Pouch containers also "air-prune" roots — when a root tip reaches the breathable fabric wall it stops and branches, producing a denser, more productive root system than a smooth plastic pot.
Compared with growing potatoes in the open ground, a Potato Grow Bag offers several concrete benefits:
- Space efficiency — a bag fits on a patio, balcony, or doorstep, ideal for small-space and urban gardening.
- Pest and disease control — fresh potting mix avoids soil-borne problems and reduces scab.
- Warmer soil — dark bags heat faster in spring, giving earlier crops.
- Clean harvest — no digging, less risk of spearing tubers with a fork.
- Mobility — bags can be moved to chase sunlight or shelter from frost.
Grow Bags vs Potato Towers vs Burlap Bags
A Potato Grow Bag, a Potato Tower, and a burlap sack all stack soil vertically, but they behave differently in practice. The Potato Grow Bag is purpose-built fabric with handles and often a harvest flap; it drains well and lasts several seasons. A Potato Tower — a column of wire mesh, timber, or stacked tyres — holds more volume but dries out fast at the edges and frequently disappoints because indeterminate growth is overestimated. Burlap bags (also sold as burlap sacks) are the cheapest route: they breathe and drain like fabric bags, but the natural fibre rots within a season or two, so treat them as a one-year option.
| Container | Drainage | Reuse | Best for |
|---|---|---|---|
| Potato Grow Bag | Excellent | 3–5 seasons | Patios, reliable yields |
| Potato Tower | Variable | Several seasons | Maximum volume, experienced growers |
| Burlap bags | Good | 1 season | Cheap, short-term trials |
Other DIY and alternative containers work on the same principle. Hay bales can be hollowed and planted directly, and some growers tuck seed potatoes into a decomposing bale for a no-dig crop. Raised beds suit larger spaces, while repurposed plastic sacks, buckets, and tubs all serve as grow bag alternatives provided you punch drainage holes.
Container Material Durability and Reuse
Fabric grow bags from makers like Gardener's Supply and Root Pouch are designed to be emptied, brushed out, and reused for three to five seasons before the seams or fabric weaken. Between crops, empty the bag completely, discard or compost the spent mix rather than replanting potatoes in it (this is part of sensible crop rotation), and store the bag dry to stop mildew. Replacing the growing medium each year, and rotating which crop goes in the bag, keeps disease pressure low.
Choosing the Right Potato Varieties for Bags
The best potato varieties for bags are compact, early-maturing types that crop heavily in a limited volume of soil. For spring and summer plantings in drier regions, reliable early and mid-season selections perform best; in central zones the same earlies plus a few mid-early varieties suit both planting windows, while in the most arid areas growers swap in tougher mid- and late-season types. Across markets, popular bag varieties include Kennebec, Red Pontiac, Russet, German Butterball, Bintje, and fingerlings such as Russian Banana, Swedish Peanut, and Butte. UK suppliers like Thompson & Morgan and the advice on Gardeners' World feature similar compact croppers.
Determinate vs Indeterminate Varieties
Determinate potato varieties set their tubers in a single layer at one level, so hilling them deeply gains you little — they suit shallower bags and earlies. Indeterminate varieties keep forming tubers up the buried stem as you add soil, so they reward the tall-bag, repeated-hilling approach with a bigger crop. Most early varieties are determinate; many maincrop and late types (such as Kennebec and German Butterball) are indeterminate, which is why they are the classic choice for deep grow bags and Potato Towers.
Early, Mid and Late Season Varieties
Matching variety to season is what gives you a continuous harvest from the same patio. Early varieties mature in about 70–90 days and are dug as new potatoes; mid-season types follow at 90–110 days; and maincrop or late varieties need 110–135 days and store best for winter. For seed saved to plant again, summer planting of earlies around 10–15 July, mid-early types around 5–10 July, and late types around 1–5 July shifts tuber formation into cooler weather and keeps the seed stock from degenerating.
Preparing Seed Potatoes (Chitting and Sprouting)
Chitting — pre-sprouting seed potatoes before planting — gives faster emergence and an earlier, heavier crop. Select clean, firm seed potatoes weighing roughly 60–100 g each; smaller tubers tend to produce weak plants and poor yields. Spread them out no more than two or three layers deep on a windowsill, shelf, or rack. If space is short, you can thread tubers onto nylon line or thin wire and hang them near a window or balcony door.
Hold the room at about 12–15°C with good light, and once a week turn the tubers, removing any that are diseased or have thin, thread-like shoots. Sprouting normally takes 20–25 days but can stretch to 40 days if the conditions slip. After 5–6 days green shoots push from the eyes, then small bumps — the beginnings of roots — form around them, and once planted these tubers root strongly.
Dry and Moist Sprouting Methods
Experienced growers often combine a dry start with a moist finish to build both shoots and roots before planting. You can chit dry in polythene bags of up to 20 kg capacity: punch holes for airflow and hang them by a window, bringing them in on cold nights if the room is unheated. Once shoots appear, switch to moist sprouting — layer the greened tubers in boxes between 2–3 cm of leaf mould, compost, or sawdust, water with room-temperature water so every layer is damp, and continue for 6–7 days until a root system develops. Move these rooted tubers to the bag very gently so the shoots and roots are not broken.
If you cannot manage dry and moist sprouting, simply warm the tubers indoors for about a week, or wilt them under cover for 5–6 days at 10–15°C. The eyes will partly break into growth, and these warmed tubers emerge 7–8 days earlier than unwarmed ones for a faster first crop.
Cutting Large Seed Potatoes
When seed is scarce you can cut large tubers lengthways into 2–3 pieces, each carrying at least 3–4 eyes and weighing 50–70 g. Cut them 2–3 days before planting so a protective corky layer forms over the wound, which guards against rot. Disinfect the knife between cuts with a 9% table-vinegar solution to avoid spreading disease, and plant cut pieces cut-side down, 2–3 cm shallower than whole tubers.
Site Selection and Sunlight Requirements
Potatoes need full sun — at least six to eight hours of direct light a day — so place the grow bag in the brightest spot you have. A south-facing patio, balcony, or wall delivers the most light and the warm soil potatoes thrive in. Because bags are portable, you can shift them through the season to follow the sun or pull them under shelter when late frosts threaten. Avoid deep shade, which produces tall, weak stems and few tubers.
Climate and Timing Considerations
Planting time depends on your climate zone and soil temperature rather than the calendar alone. Plant earlies once the soil has warmed to 6–8°C at a depth of 8–10 cm — in many regions that falls in the second or third week of March, coinciding with the sowing of early cereals; a cold spring pushes the date back 10–12 days. In cold areas such as Zone 3 growers wait for the last hard frost, while milder Zone 6b and the mild, foggy Bay Area allow both a spring and a fall crop. Don't plant too late: rushing the season risks frost, but delaying earlies too long sacrifices yield.
Regional advice is worth seeking out. In the United States the Cooperative Extension Service and the UC Master Gardener Program — including the UC Master Gardeners of Contra Costa County in California — publish locally tuned planting dates, as do Master Gardener's Program volunteers elsewhere. In the UK, University of Glasgow horticulture resources, Gardeners' World, and suppliers such as Thompson & Morgan reflect the cooler, wetter UK Agriculture context. The Plant Village database is a useful free reference for diagnosing problems anywhere.
Filling the Bag: Soil and Drainage
Fill a potato grow bag with a light, free-draining, fertile mix rather than heavy garden soil, which compacts and waterlogs in a container. A good blend is roughly equal parts quality potting compost and well-rotted organic matter, lightened with a handful of grit or perlite; sandy loam soil is ideal if you mix your own. Bagged products such as Organic Energized Potting Mix, Organic Raised Bed Mix, or a general-purpose potting compost all work well. Aim for a slightly acidic pH of about 5.0–6.0, which suits potatoes and helps suppress scab.
Drainage Requirements for Containers
Good drainage is the single most important factor in a potato bag, because sitting water rots tubers and seed pieces. Fabric grow bags drain through their walls, but if you use a solid plastic sack or bucket, punch several holes in the base and lower sides. Stand the bag on feet, slats, or bricks so excess water escapes freely, and never let the bag sit in a saucer of water.
Composting and Soil Management
Building your own compost gives the rich, moisture-holding organic matter potatoes love and closes the garden's nutrient loop. Mix mature compost or well-rotted manure into the potting blend before planting at roughly a quarter to a third by volume. After harvest, don't reuse spent potato compost for potatoes again — instead spread it on ornamental beds or add it back to the compost heap, and refill the bag with fresh mix to manage disease. Potato haulm (the dead foliage) can be composted, but burn or bin any blight-infected leaves rather than composting them.
Planting Seed Potatoes in Grow Bags
Plant chitted seed potatoes into a partly filled bag, then build the soil up around the growing stems over the following weeks. Begin with 10–15 cm of moist mix in the base, set the seed potatoes on top with their strongest sprouts pointing upward, and cover them with 8–10 cm of soil. Rolling the bag's sides down at first makes planting and early hilling easier, then unroll them as you add more mix.
Planting Depth and Spacing
Spacing controls tuber size: too many plants per bag gives a mass of small potatoes. As a rule, allow one seed potato per 10 litres of bag volume — typically 2 to 4 tubers in a standard Potato Grow Bag, or up to 5 in a jumbo bag. In open ground the equivalent spacing is about 25–30 cm between plants with 60 cm between rows; cut pieces go a little shallower than whole tubers and about 20 cm apart. Lay cut tubers cut-side down into loosened soil rather than dropping them in, to protect the developing roots.
Earthing Up as Plants Grow
Earthing up — also called hilling — is what multiplies your crop, because indeterminate potatoes form new tubers along the buried section of stem. When the shoots reach 15–20 cm, add enough soil or compost to bury the lower two-thirds, leaving the top leaves exposed. Repeat every couple of weeks as the plants climb until the bag is full. Hilling with moist soil also encourages extra roots, protects shoots from late frost, and stops light reaching the tubers, which prevents green potato toxicity (the bitter, mildly poisonous solanine that forms in light-exposed, greened tubers).
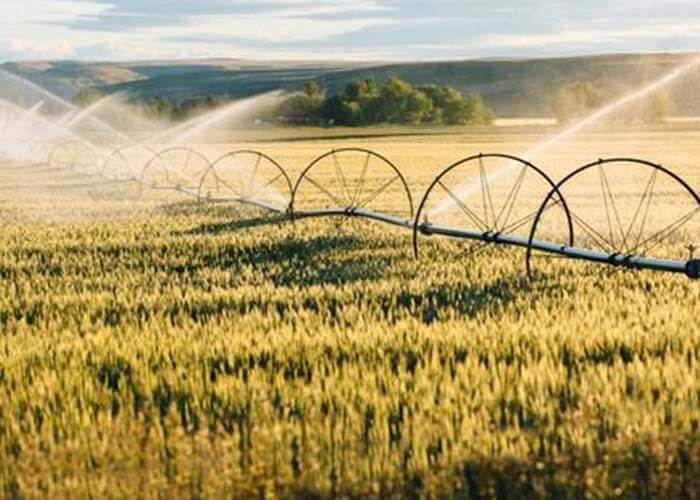
Watering Schedule and Moisture Management
Consistent moisture is critical in a grow bag, which dries out far faster than open ground. Keep the mix evenly damp but never waterlogged, watering deeply rather than little and often — in warm weather a full bag may need water daily. Demand peaks at flowering, when the tubers are bulking; long dry gaps at that stage halt tuber growth and cause knobbly, cracked potatoes. Watering in the evening reduces evaporation, and easing off in the last 12–14 days before harvest helps the skins set for storage.
Drought Management and Water Conservation
In hot, dry climates you can cut water loss with simple measures that also suit Bay Area summers and arid regions. Mulch the soil surface with straw or compost, group bags together so they shade each other's sides, and move them out of fierce afternoon sun if foliage wilts. Larger bags hold more moisture and buffer against drought better than small ones, and a layer of water-retaining organic matter in the mix reduces how often you need to irrigate. Self-watering reservoirs or drip lines make consistent watering easier where water is scarce.
Fertilization Strategies and Nutrient Needs
Potatoes are hungry feeders, so a base feed at planting plus regular top-ups through the season gives the best yield. Mix a balanced All-Purpose Fertilizer or a slow-release organic feed into the soil before planting, then begin liquid feeding every two weeks once the plants are growing strongly, easing off as the foliage starts to die back. The first feed is well timed when shoots reach 12–15 cm, the second at 15–20 cm.
Organic growers get excellent results from diluted poultry manure: ferment about 500 g of droppings in water for 4–5 days, then dilute into a full bucket and apply along a shallow channel beside the plants at roughly 40–50 g per square metre. Read the plants to fine-tune feeding:
- Lush foliage but few tubers means too much nitrogen and not enough else — add about 30 g of superphosphate and 10 g of potassium sulphate per square metre to rebalance.
- Pale, weak, stunted plants signal nitrogen shortage — feed with diluted manure or a nitrogen source such as ammonium nitrate.

Pest Identification and Control Methods
Grow bags suffer fewer soil pests than open ground, but potatoes still attract several insects and diseases you should learn to spot early. The main threats are the Colorado potato beetle, slugs (Naaktslakken), aphids, and fungal diseases — chiefly potato blight (late blight). Inspect plants regularly, remove pests by hand where you can, and reach for organic controls before stronger chemicals. The free Plant Village resource and your local Cooperative Extension Service can confirm an identification.
Blight is the most serious disease: it shows as dark brown blotches on the leaves with a white mould on the undersides on damp mornings, then spreads to the tubers as greyish, sunken patches. It thrives when temperatures fall to 13–14°C with rain and high humidity. At the first leaf spots, spray with a copper-based fungicide (such as 1% Bordeaux mixture) in dry, still weather, and remove badly affected foliage; never save seed from a blighted crop. The same early spraying also helps prevent related fungal diseases. Maintaining airflow, avoiding overhead watering, and high early hilling all reduce blight pressure, while replacing the bag's soil each year limits scab and other soil-borne problems.
Colorado Potato Beetle Management
The Colorado potato beetle — a rounded, yellow-and-black striped potato beetle whose orange larvae strip foliage fast — is the classic potato pest. Control it organically by handpicking adults, eggs, and larvae into soapy water daily, and by encouraging predators. For heavier infestations, sprays based on Bt (Bacillus thuringiensis, specifically the strain effective against beetle larvae), Neem oil, or a botanical product such as Pyola® Insect Spray knock down larvae while sparing most beneficial insects. Rotating where you grow and starting each season with fresh bag soil breaks the beetle's overwintering cycle.
Pollinator-Friendly and Biodiverse Gardening
A garden that supports pollinators and natural predators controls pests for you, so avoid broad-spectrum insecticides that harm beneficial insects. Potato flowers themselves contribute little to the crop and can be pinched off to redirect energy to tubers, but interplanting nearby flowers — companion planting around your bags — draws in bees and the hoverflies and ladybirds that eat aphids. Leaving a few wild corners, providing water, and choosing nectar-rich plants build the biodiversity that keeps a small patio garden in balance. Where the Asian hornet (Aziatische hoornaar) threatens native bees, supporting local pollinators (bestuivers) matters all the more.

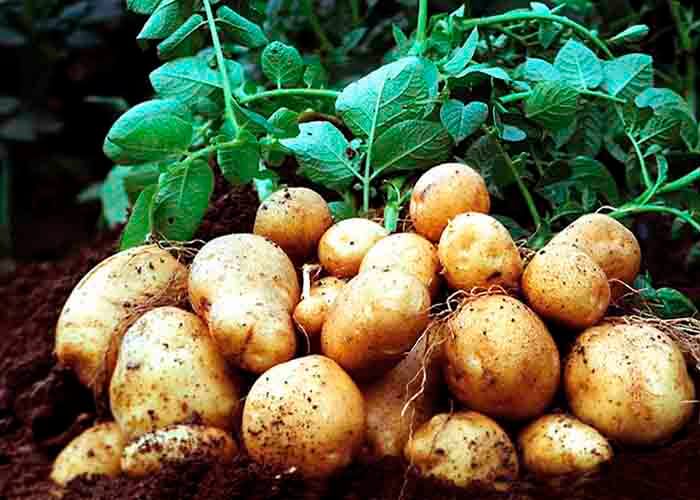
Harvesting Potatoes from Grow Bags
Harvesting from a grow bag means simply tipping it out — no digging and almost no damaged tubers. The biggest tuber bulking happens between full flowering and the start of the lower leaves dying back, when daily gains can be substantial, so harvest timing changes what you get. The two main approaches are:
- New potatoes — about 2–3 weeks after the plants flower, reach gently into the top of the bag (or through a harvest flap) and pick a few tender, thin-skinned tubers while leaving the rest to grow.
- Main crop — wait until the foliage yellows and dies back, stop watering for a week or two so the skins set, then tip the whole bag onto a tarp and sort the crop.
A useful readiness check is a trial dig: if tubers are at least 3 cm across, the crop is ready. Lift in dry, sunny weather, but don't leave dug tubers in direct sun, as they green and turn bitter, and don't leave mature potatoes sitting in the bag after the foliage dies — they lose weight and store poorly. A healthy large bag commonly yields 2–3 kg.
For storage, cure the tubers first: let them dry in a dark, airy, frost-free place for one to two weeks so the skins toughen. Thin-skinned or immature tubers especially benefit from 10–15 days of air-drying. Store cured potatoes in the dark at about 4–7°C in paper or hessian sacks, never in light (which greens them) or sealed plastic (which rots them). Discard any green or damaged tubers, as greened potatoes accumulate toxic solanine and are not safe to eat.
Common Beginner Mistakes and How to Avoid Them
Most grow bag failures come from a handful of avoidable mistakes, and learning from them turns a poor first attempt into a reliable crop. Online communities such as Reddit, the Permies.com forum, and grower groups on Facebook are full of beginners comparing notes on exactly these errors. The most frequent ones are:
- Overcrowding — too many seed potatoes per bag gives lots of marble-sized tubers; stick to 2–4 in a standard bag.
- Letting the bag dry out — inconsistent watering causes cracked, hollow, or knobbly potatoes.
- Skipping hilling — failing to earth up exposes tubers to light and cuts the yield.
- Too much nitrogen — heavy feeding gives big leafy plants and few potatoes.
- Reusing old soil or saving blighted seed — both carry disease into the next crop.
- Harvesting too early or far too late — use a trial dig to judge readiness.
Beyond potatoes, the same container principles carry over to growing other vegetables and ornamentals in small spaces — from olive trees (Olijfboom) and hydrangeas (Hortensia) to dahlias — and to wider backyard growing generally. If you want to read more around food growing, science, and outdoor life, browse the Agronomy section or the main articles index.
Growing Potatoes Alongside Other Crops
You can grow potatoes alongside companion crops to make the most of a small plot. Beans and peas fix nitrogen nearby, and an old practice in some regions interplants potatoes with maize, whose shade shelters the potatoes from drying winds and high temperatures so the foliage lasts longer and the tuber yield rises — a valuable trick in dry districts. Choose a short-stemmed sweetcorn so it doesn't overshadow the potatoes entirely.

Where space is very limited, a single well-fed plant can be coaxed into a large yield by repeated deep hilling: enrich a small area heavily with compost, plant one chitted tuber of at least 100 g in a hollow, and each time the stems reach 15–18 cm bend and bury them under 5–6 cm of soil. Repeated three or four times until a mound 50–60 cm high builds up, this produces a vigorous, multi-stemmed plant that can return a strikingly heavy crop from one root — the same earthing-up principle that makes grow bags and Potato Towers so productive.