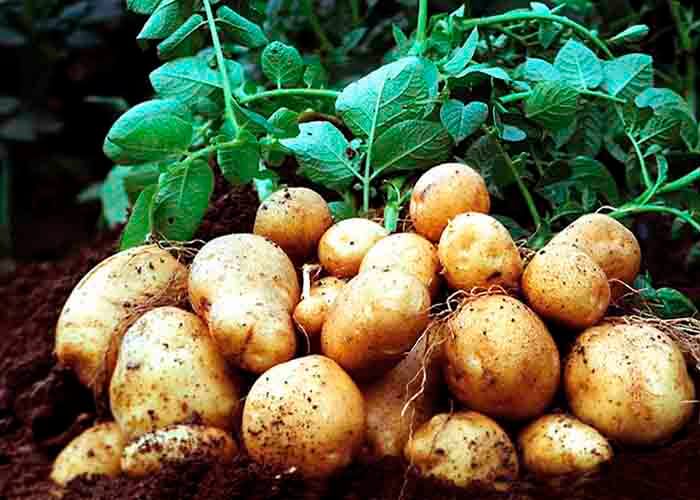
Growing Seedlings: Methods and Lights for Healthy Vegetable Transplants
 libre
libre
Lights for supplemental seedling lighting give your young plants the bright, full-spectrum light they need when natural daylight is too short or too weak. Indoors in late winter and early spring, a sunny windowsill rarely delivers enough light, so seedlings stretch and weaken. A dedicated grow light fixes that — and growing strong transplants gives plants a 30 to 60 day head start, letting you harvest several crops from the same plot across one season.
Supplemental lighting is essential for raising early cabbage, early tomatoes, cucumbers, and for growing peppers and eggplant from seed indoors before transplanting.

Why seedlings need supplemental grow lights
Seedlings need supplemental grow lights because windowsill light is too dim and one-sided to grow sturdy, compact plants. Indoor seed starting in winter and early spring coincides with the shortest days of the year, when light intensity and duration both fall far below what germinating seedlings require. Without enough light, seedlings stretch toward the window, develop thin pale stems, and topple over — the classic "leggy" problem. A grow light positioned directly above the tray delivers even, intense light from above and keeps growth short and strong.
Grow lights also free you from the seasons. With artificial light you can run an indoor seed starting system year-round, raise microgreens and culinary herbs on a countertop in midwinter, and keep light-loving houseplants healthy through dark months. The University of Minnesota Extension recommends 14 to 16 hours of supplemental light per day for most vegetable seedlings, kept just a few inches above the foliage — a standard that is impossible to meet on a windowsill alone.
Common alternatives exist but each has limits. A bright south-facing windowsill works for a few undemanding plants but not for trays of vegetable seedlings. Winter sowing — starting seeds in covered containers outdoors — skips lights entirely but only suits cold-hardy and native plants. For reliable results across many crops, a grow light remains the most dependable option.
Benefits of LED grow lights for indoor gardening
LED grow lights are the best all-round choice for indoor gardening because they combine low running costs, low heat, and a long service life. An LED (Light-Emitting Diode) converts most of its electricity directly into usable light rather than heat, which is why LED technology has largely replaced older fluorescent fixtures for seed starting. For anyone raising seedlings on a shelf or tabletop, the practical benefits are clear:
- Low heat output — LEDs run cool enough to sit close to tender seedlings without scorching them, while fluorescent tubes radiate more heat and must be watched.
- Long lifespan — quality LED fixtures last tens of thousands of hours, far outliving fluorescent bulbs that dim and need replacing every season or two.
- Energy efficiency — LEDs draw a fraction of the power of comparable fluorescent or incandescent lighting.
- Full-spectrum output — Full Spectrum LED fixtures provide the balanced wavelengths seedlings use for sturdy growth.
- Durability — solid-state LEDs have no fragile glass tube or filament to break.
Energy efficiency and electricity savings
LED grow lights cut electricity costs sharply compared with fluorescent and incandescent lighting. The U.S. Department of Energy reports that LED lighting uses up to 75% less energy and lasts up to 25 times longer than incandescent lighting — savings that add up quickly when a fixture runs 14 to 16 hours a day for months. Lower heat output also means LEDs waste less of their energy warming the room instead of lighting the plants, improving operating economics over a full growing season.
Light spectrum and brightness for seedlings
Seedlings grow best under bright, full-spectrum light, and the two specifications that matter most are color temperature and intensity. Color temperature is measured in Kelvin (K) and describes the tone of the light; intensity is what determines whether seedlings stay compact or stretch. Getting both right is more important than the brand on the fixture.
Color temperature and spectrum (4000K and full spectrum)
A color temperature around 4000K gives seedlings a balanced, daylight-like spectrum that promotes short, sturdy growth, while full-spectrum LED fixtures cover the broader range of wavelengths plants use. Cooler "daylight" bulbs in the 5000–6500K range are also widely used for the vegetative seedling stage. Many dedicated LED grow lights produce the familiar pink/purple glow because they combine red and blue diodes — the wavelengths that drive photosynthesis most efficiently — and these are favored for professional-looking results. For raising seedlings, either a 4000K full-spectrum white fixture or a red/blue grow light works well.
Light intensity is measured in lumens for general brightness, while plant-relevant intensity at the leaf is often checked in lux or foot-candles with a light meter. Intensity falls off rapidly with distance, which is why fixture height matters so much: light measured a few inches from the bulb is many times stronger than light a foot away. Keeping a grow light 2–4 inches above seedlings (for LEDs) ensures enough intensity and penetration reaches the foliage.
Choosing plants based on light requirements
Match the grow light to what you are growing, because plants vary widely in how much light they demand. High-light vegetable seedlings such as tomatoes, peppers, and eggplant need intense light close to the canopy for 14–16 hours a day. Microgreens and culinary herbs are less demanding and thrive under modest tabletop fixtures. Low-light houseplants like snake plants and succulents tolerate far less and can sit further from the light. Sizing the fixture to both the plant's needs and the space available — a single tabletop unit versus a multi-tier stand — prevents overspending on light a plant can't use.
How to choose a seedling grow light on a budget
You can light seedlings well on a budget by choosing the cheapest fixture that delivers enough full-spectrum intensity for your tray size — often a linkable LED shop light rather than a premium grow light. The key is to compare the total cost against the light you actually get, not just the sticker price. Affordable, effective setups include:
- A linkable 4 ft LED shop light such as the Braun 5500 Lumen 4 ft. Linkable LED Hanging Shop Light or Hyper Tough 5500 Lumen 4ft Linkable LED Shop Light from Home Depot, hung over a seed tray.
- Strip-style fixtures like Barrina Grow Lights that link end-to-end to cover a shelf cheaply.
- Compact tabletop units such as the Versa™ Tabletop Grow Light or SunBlaster LED Indoor Micro Growlight Garden for small spaces.
- All-in-one kits like the Epic Grow Light with Tray or Burpee LED Two-Tier Cart Grow Light when you want lighting and trays together.
Shop lights vs grow lights: cost comparison
Ordinary LED shop lights are far cheaper than branded grow lights and work well for seedlings, which is why many experienced growers recommend them. Gardening educators such as Gary Pilarchik of The Rusted Garden and Meg Cowden, author of The Modern Homestead Garden: Growing Self-sufficiency in Any Size Backyard, have long pointed out that an inexpensive 5000–6500K shop light produces sturdy seedlings at a fraction of the price of a purpose-built fixture. The trade-off is that shop lights lack the tailored red/blue spectrum and the integrated trays, timers, and mounts that dedicated grow lights offer.
Comparing prices across grow light types
Grow light prices range from low-cost shop lights to premium designer fixtures, and the right pick depends on scale and aesthetics. The table below outlines typical categories and representative products.
| Type | Best for | Examples |
|---|---|---|
| Linkable LED shop light | Budget multi-tray seed starting | Braun 5500 Lumen, Hyper Tough 5500 Lumen |
| Fluorescent T5 / T8 | Traditional shelf setups | T5 Fixture, Sunlite T8, Philips ALTO |
| Tabletop LED | Herbs, microgreens, small spaces | Versa™ Tabletop, Vita™ Grow Light, Grove™ LED Grow Light |
| Multi-tier stand | Large indoor seed starting | Barrina CX3 Four-Tier Plant Stand, Stello™ Pendant Stand |
| Designer / ambient | Houseplants on display | Aura™ Ambient Grow Light, Luna™ Wooden Pendant Wall Mount |
Specialty fixtures such as the Aspect™ Gen 2 LED Growlight, Dynamo LED Grow Light, and Highland™ LED Track Light System, along with high-output panels like the Roleadro 300W LED, sit at the higher end. Retailers including Gardeners Supply, Home Depot, and educational sites such as Epic Gardening, Shifting Roots (based in Saskatoon, SK), and the Fresno State Ornamental Horticulture Nursery offer comparison tools and reviews to help weigh value against performance.
Adjustable vs non-adjustable grow lights
Adjustable grow lights let you raise the fixture as seedlings grow, which is the single most useful feature for preventing leggy growth — non-adjustable fixtures force you to move the plants instead. Because the ideal distance between light and foliage changes as seedlings develop, an adjustable mount keeps intensity correct throughout the seedling stage without constant rearranging.
Height adjustment and fixture positioning
Keeping the light at the right height is the difference between stocky transplants and stretched ones. Position LED fixtures roughly 2–4 inches above the seedling tops and fluorescent tubes a little farther, then raise the light as the plants grow to hold that gap. Stands with chains, ratchet hangers, or sliding brackets — like those on the Barrina CX3 Four-Tier Plant Stand or the Stello™ Pendant Stand — make this quick. Watch for leaves reaching upward or paling, both signs the light is too far away.
Mounting and installation systems
Grow lights can be mounted several ways depending on space and whether you want them permanent. Common mounting solutions include:
- Wire shelving with hanging lights — a classic, flexible setup where fixtures hang on chains from each shelf, doubling as seed tray organization.
- Pendant mounts — fixtures like the Luna™ Wooden Pendant Wall Mount or Stello™ Pendant Stand suspend the light over plants.
- Wall mounts — adjustable options such as the Pinocchio Adjustable Wall Mount keep counters clear.
- Track systems — the Highland™ LED Track Light System lights a row of plants along a wall.
- Hardwired fixtures — permanent shop-light installations for dedicated grow rooms.
For T8 fluorescent fixtures, setup involves wiring the fixture and, for some retrofits, an LED ballast bypass conversion so newer LED tubes run directly off line voltage. Accessories such as a Connector Kit, Angle Kit, and grow light connector cords let you link multiple strip fixtures into a single run across a shelf.
Lighting schedule: how many hours to light seedlings
Run seedling grow lights 14 to 16 hours a day, then off for 8 to 10 hours so plants get the dark rest they need. Seedlings, like all plants, use the dark period for important growth processes, so continuous light is not simply "more is better." The simplest way to control light duration is an automatic timer or smart plug that switches the fixture on and off at the same times each day.
Smart plugs make scheduling effortless and add remote control. Devices such as the TP-Link Kasa Smart Wi-Fi Plug Slim, Leviton Decora Smart Mini Plug-In Switch, and similar smart-home plugs let you set timers, automate lighting, and integrate grow lights into a smart-home routine — useful when you are away. A basic mechanical timer works just as well for plain on/off scheduling at lower cost.
24/7 lighting for seedlings: pros and cons
Running grow lights 24/7 is generally not recommended for seedlings because plants need a daily dark period to grow normally. Some growers use continuous light briefly to speed germination or push very fast early growth, and certain crops tolerate it, but for most vegetable seedlings round-the-clock light wastes electricity and can stress the plants. A 16-hours-on, 8-hours-off cycle is the safer, more efficient standard.
Methods of growing seedlings
Seedlings can be raised in many different settings — in hotbeds, greenhouses, seedbeds, indoor rooms, or even directly in open ground. Containers are just as varied: tin cans, paper cups, milk cartons, clay pots, and wooden flats all work for starting seeds before transplanting.
Building a hotbed
A hotbed is a good structure to build on a home garden plot. Dig a pit 50–70 cm deep, 120 cm wide at the bottom and 145 cm at the top. Standard hotbed frames 160 cm long and 106 cm wide are laid on a wooden edging frame.
If you don't have standard frames, you can successfully use any spare window frames the gardener has on hand. In that case the edging box should be built to match the dimensions of those frames.

Preparing biofuel and hotbed soil
Before sowing, fresh manure — horse, cow, household, or leaf-mold manure — is prepared in advance to serve as biofuel, and it must be laid in hot. To heat it, gather the manure into a loose pile up to 1.5 m high; to raise the temperature faster, pour hot water over it or place stones or quicklime inside. Before packing, the manure should be no cooler than 60°C. Without a thermometer you can judge by hand — a hand cannot bear 60-degree heat for long. The manure must be laid into the pit loosely but with no voids.
The hotbed is then covered with frames and mats for 2–3 days so the soil settles. To stop manure fungi from growing, scatter hydrated lime over the biofuel at about 0.5 kg per frame. On top of the biofuel, spread hotbed soil made of 43% turf soil, 55% humus, and 2% sand. This mix can be reused the following year, but it must first be disinfected: prepare a water solution of 40% carbathion, apply 3 L/m², and dig it in no later than 30 days before sowing seeds or planting seedlings.
Level the surface carefully, draw furrows 1–1.5 cm deep spaced 5–6 cm apart, and sow seeds every 1.5–2 cm. Cover them gently and water with warm water. Keep the soil slightly moist at all times and water only with room-temperature water. As soon as the seedlings show their first true leaves, transplant them.
Sowing seeds and pricking out plants
When pricking out, lift each plant with a dibber and replant it under another frame, spacing plants 6–7 cm apart both within and between rows. The key is to avoid bending or twisting the root: lower it into the hole made by the dibber right up to the seed leaves, and water the plants immediately.
Temperature regime and hardening off seedlings
Early seedling growing deserves close attention, especially during hardening off. The maximum daytime temperature should not exceed 30°C and the nighttime 20°C. Before hardening, the maximum is up to 5°C for cabbage, 8°C for tomatoes, and 8°C for cucumbers; during hardening these drop to 1°C for cabbage, 3°C for tomatoes, and 5°C for cucumbers. Relative humidity should stay at 70–80%, which means good ventilation is essential.
To harden the plants, the frames are first removed for only a few hours during the day, then for the whole day, and a few days before transplanting at night as well. During this period watering is reduced and then stopped entirely. A single heavy watering is given only on the evening before planting, once the seedlings have been accustomed to direct sunlight.
Feeding seedlings
Feed seedlings once or twice during the growing period using 20–30 g each of ammonium nitrate, superphosphate, and potassium salt dissolved in 10 L of water, applied at 6 L/m². Proper feeding is the final step in preparing seedlings for transplanting into open ground, ensuring they are strong enough to establish quickly after planting.
Film-covered greenhouse
A film-covered greenhouse is even better than a hotbed for raising seedlings. Build the frame from any material, including wooden beams of 10×10 cm section, in whatever size suits you. One workable design has frame supports 2.3 m high on the north side and 1.5 m on the south; along the greenhouse base, beams laid on brick are set in cement mortar.
Matching uprights connect the lower and upper frame ties and the crossbars. The greenhouse is then sheathed in film, including the entrance door. If the greenhouse cannot be heated, use it a little later in the season on biofuel heating instead. As the first warm days arrive, prepare the soil inside and sow the seeds.
Windowsills, special étagères by sunny windows, and heated verandas can also be used for raising seedlings, but here there is a real risk of the seedlings becoming soft and overdrawn. To harden them, the trays of seedlings should be carried outdoors. Where frames are lacking, seedlings can be grown in the simplest insulated-ground structures, including ground-level hotbeds with solar heating under a polyethylene cover: dig over a strip of soil 1 m wide to a depth of 20–24 cm, fence it with boards or slabwood 15–30 cm high, and sow. Keep the seedbed open by day and cover it at night with roofing felt, mats, or any other material.
DIY: building your own seedling grow light
You can build a capable seedling grow light yourself by mounting linkable LED shop lights or strip lights on a wire shelving unit — a setup that costs far less than a packaged system and scales to any number of trays. The basic build is a metal wire shelf with a full-spectrum or daylight LED fixture hung beneath each shelf on adjustable chains, plugged into a timer. This is the configuration most home growers use, and it doubles as both light mounting and seed tray organization.
Connector and expansion kits
Connector and expansion kits let you chain several light fixtures into one run, which is what makes a DIY multi-shelf stand practical. Linkable fixtures join end-to-end with short jumper cords, while a Connector Kit, Angle Kit, and grow light connector cords handle corners and gaps between shelves. Many strip lights, including Barrina Grow Lights, are designed to link in series so a single plug powers a whole shelf — keeping the wiring tidy and the cost per tray low.
Common seedling problems from too little light
Most seedling problems indoors trace back to insufficient light, and the warning signs are easy to read once you know them. Pale leaves, slow growth, and stems leaning hard toward a window all signal that plants aren't getting enough light. Heat management matters too: seedlings too close to a hot fluorescent tube can scorch, while LEDs run cool enough to avoid this. Correcting light — moving the fixture closer, extending the photoperiod to 14–16 hours, or adding a brighter bulb — resolves the majority of these issues.
Leggy growth and how to prevent it
Leggy seedlings — tall, thin, pale, and floppy — are caused by too little light, and the fix is brighter light placed closer to the plants. Seedlings stretch when they have to reach for a distant or weak light source, producing weak stems that struggle to support the plant. To prevent leggy growth:
- Keep the grow light 2–4 inches above the seedlings and raise it as they grow.
- Run lights 14–16 hours a day for adequate total light.
- Use a bright, full-spectrum or daylight (4000–6500K) fixture, not a dim household bulb.
- Provide gentle air movement or brushing to thicken stems.
Once seedlings have stretched, you can't reverse it, but burying transplants deeper at planting (for plants like tomatoes that root along the stem) helps recover stability.
Buying used grow light equipment
Buying used or refurbished grow lights can cut costs significantly, and LED fixtures hold up well secondhand because they have no fragile tubes and a very long rated lifespan. Look for listings on local marketplaces and community forums such as Reddit, and check refurbished sections from established retailers. When buying used, confirm the fixture powers on, inspect for damaged diodes or cracked housings, and verify the color temperature suits seedlings. Older fluorescent fixtures are cheap secondhand but dim with age, so factor in the cost of replacement bulbs and a possible LED ballast bypass conversion if you plan to upgrade the tubes.
Reviews and ratings of seedling grow lights
Customer reviews and ratings are one of the most useful tools for choosing a grow light, because they reveal real-world durability and brightness that specs alone don't show. Many retailers collect verified reviews through platforms like Okendo, and gardening educators publish hands-on comparisons. Voices worth following include Gary Pilarchik (The Rusted Garden), Meg Cowden, and writers such as Amanda Nadeau and Calliope Correia, along with extension resources from the University of Minnesota Extension. When reading reviews, weigh comments on light intensity, build quality, adjustability, and how plants actually performed over a full seedling season rather than star ratings alone.