A Complete Guide to Growing Beans for Home Gardeners
 libre
libre
Growing beans is far less demanding than many home gardeners assume, and a single row can supply a household with protein-rich pods from midsummer until frost. On backyard plots amateur gardeners rarely sow beans, yet the crop rewards minimal effort with heavy yields and improves the soil it grows in. 
Why beans are good for your health and nutrition
Beans belong to the legume family Fabaceae and pack more protein into their immature seeds than common French beans or green peas, which makes them one of the most nourishing crops a vegetable garden can hold. The seeds also contain natural sugars, vitamins, and mineral salts, and dry beans store this nutrition for months without losing value.
Beans deserve a permanent place in the home garden for reasons beyond protein. Infusions and decoctions of the flowers have long served as a gentle cosmetic remedy in folk medicine, and the plant's roots fix atmospheric nitrogen, leaving the soil richer for whatever crop follows. As a member of the bean family, this crop combines food value with genuine benefits for the rest of the plot.
Types and varieties of beans
Beans fall into two broad groups defined by how the plant grows and several use-categories defined by how the pods and seeds are eaten. Most garden beans belong to the species Phaseolus vulgaris, but the wider bean world also includes Lima beans, Fava beans, Scarlet runner beans, and the heat-loving Vigna group such as Southern peas and Asparagus beans. Knowing the category helps you pick a variety that matches your climate, space, and kitchen.
- Snap beans (Green beans): eaten whole as tender pods, the most common garden type.
- Shell beans: harvested when seeds are plump but still soft, shelled fresh.
- Dry beans: left on the plant until the pods dry, then stored as hard seed.
- Wax beans: yellow-podded snap beans such as Gold Rush and Rocdor.
- Purple beans: varieties like Royal Burgundy, Purple Queen, and Royalty Purple Pod that turn green when cooked.
- Romano (flat-podded) beans: broad Italian-style pods such as Roma II and Romano Gold.
Bush beans versus pole beans: what's the difference
Bush beans grow as compact, self-supporting plants about 30–60 cm tall that produce a concentrated crop over a few weeks, while pole beans climb 2 metres or more and keep cropping for the whole season if picked regularly. Bush beans need no support and suit short rows and quick succession sowings; pole beans need a trellis but yield far more from the same ground area and are easier to harvest standing up. Many gardeners grow both — bush types for an early flush, pole types for sustained pickings.
Popular bean varieties for the home garden
The right variety depends on whether you want quick bush beans, long-cropping pole beans, or beans for drying. Reliable cultivars below have proven themselves in home gardens, and several carry recognition from All-America Selections, the trial program that vets new varieties for North American gardeners.
- Bush snap beans: Contender, Provider, Topcrop, Venture, Derby, Blue Lake bush, Improved Tendergreen, and the heat-tolerant Gina.
- Pole snap beans: Kentucky Wonder, Blue Lake pole, Fortex, Emerite, and Scarlet Runner.
- Compact and container types: Mascotte and Money, bred for small spaces and pots.
- Wax and purple: Gold Rush, Rocdor, Royal Burgundy, and Purple Queen.
- Dry and heirloom beans: Black Valentine, Calypso, Jacob's Cattle, and Tiger's Eye, all popular with seed savers.
Preparing seeds and soil for sowing
Good germination starts with sound seed and warm, well-drained, fertile soil in full sun. Beans need at least six to eight hours of direct sunlight and a loose loam enriched with compost; avoid heavy nitrogen feeding, since the plants fix their own and excess nitrogen produces leaves at the expense of pods. Work the bed to a fine tilth and rake it level before drawing out the rows.
Soaking and sprouting bean seeds
Soaking bean seeds for a few hours before sowing softens the seed coat and speeds emergence, but it is optional and over-soaking can split the seed. A more reliable boost is to keep the soil consistently moist after sowing rather than pre-soaking heavily. Beans germinate best by being sown directly where they will grow, because the brittle young roots resent transplanting.
Sowing dates and soil temperature
Sow beans only after the danger of frost has passed and the soil has warmed to at least 16 °C, since seed sown into cold, wet ground rots instead of sprouting. In practice beans go in early, at the same time as peas in many gardens, once spring soil temperatures are reliably above this threshold. Germination is fastest at soil temperatures of 21–27 °C, when seedlings appear in about a week.
Growing beans
Growing beans, like other vegetable crops, repays steady but modest attention through the season. Sow early, at the same time as peas, and the plants will largely look after themselves apart from watering, weeding, and one or two feeds. Bean stems can reach 1.5–2 metres in the climbing types. 
Sowing depth, spacing, and planting layout
Space seeds 8–10 cm apart in the row, leave 45 cm between rows, and sow 6–8 cm deep at a rate of about 20–30 g per square metre. Pole beans can be set a little wider to allow for their size, while bush beans tolerate the closer spacing. You can also tuck rows between cucumbers or potatoes to make use of spare ground. For a continuous supply, practise succession sowing: start a new short row of bush beans every two to three weeks until midsummer so picking never stops.
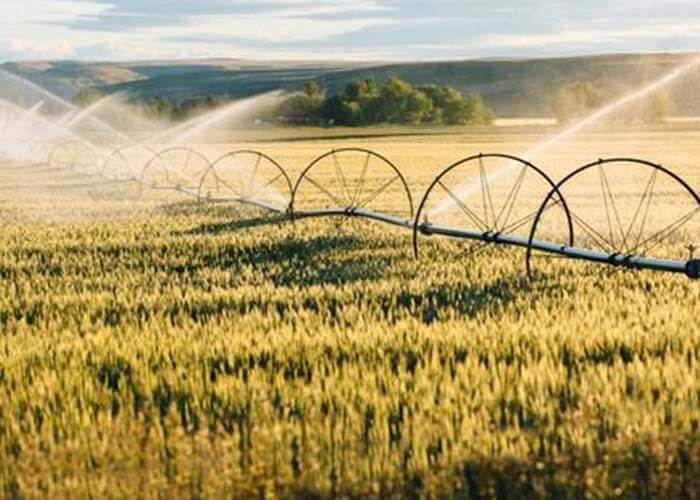
Watering, loosening, and feeding
Over the growing season beans need 3–4 waterings, 2–3 loosenings of the soil, and 1–2 feeds, with extra water critical from flowering through pod set when moisture shortage drops the pods. Mulching with straw or grass clippings conserves that moisture, suppresses weeds, and keeps soil temperature even. An effective feed is diluted cow manure (1:6) or chicken manure (1:10) with 30 g of ammonium nitrate added per 10 litres of solution, applied at a rate covering 4–5 square metres — but go light, as beans need little added nitrogen.
Supports for climbing beans
Pole beans must have something to climb, and the support should be in place at sowing so the stems can grab on as they rise. Suitable structures include a row of 2.4-metre poles, a teepee of canes tied at the top, a string trellis stretched between posts, or netting against a fence. Set the support firmly, because a mature, fully laden row of pole beans catches the wind and a flimsy frame will topple.
Growing beans in containers and raised beds
Beans grow well in containers and raised beds, which warm earlier in spring and drain freely, giving a head start in cool regions. Choose compact bush varieties such as Mascotte or Money for pots, use a container at least 20–25 cm deep with drainage holes, and water more often since pots dry quickly. Raised beds suit both bush and pole types, and a trellis fixed along the bed's edge supports climbers without shading the rest.
Cold and frost tolerance of beans
Beans are warm-season, frost-tender plants that are killed or badly checked by even a light frost, which is why sowing must wait until the season is settled. Fava beans are the exception — they tolerate cool weather and light frost and can be sown earlier — but common Phaseolus beans need protection if an unexpected cold snap threatens young seedlings. Cover rows with fleece on chilly nights early in the season.
Bean diseases and pests
Beans are generally hardy but can suffer from a handful of fungal and bacterial diseases and a few persistent insects, most of which are controlled by good spacing, crop rotation, and dry foliage. Common problems include bacterial blight (bean blight), Cercospora leaf spot, powdery mildew, and root rot in waterlogged soil. Rotating beans so they don't follow legumes for three years, watering at the base rather than over the leaves, and removing infected plants keep most diseases in check.
Controlling aphids and other pests
Plants are often attacked by aphids, which colonise the tender growing tips and can be rinsed off, pinched out, or treated with insecticidal soap before they spread. The Mexican bean beetle is the most damaging pest in many regions: the coppery adults and spiny yellow larvae skeletonise leaves from below, and they can be controlled by hand-picking, by the parasitic wasp Pediobius foveolatus, or by destroying spent plants promptly. Leafhoppers cause stippled, curled foliage and respond to row covers in the early season.
Harvesting beans
As soon as the beans set their pods, the shoot tips are pinched out together with their leaves, which directs energy into the developing crop and discourages aphids that gather at the tips. Beans for fresh eating are ready well before the seeds swell, while shell and dry beans are left longer on the plant.
Harvest timing and technique
Harvesting is done selectively every 6–10 days, picking pods at the stage that matches their use and always with both hands so the brittle stems aren't torn. Snap beans are picked young, when the pods snap cleanly and the seeds inside are still small; shell beans are gathered when the seeds are plump but the pods still soft; dry beans stay on the plant until the pods are papery and rattle. Regular picking is the single most important task — pods left to mature signal the plant to stop flowering.
Expected yield per plant and per row
A healthy bush bean plant yields roughly 100–150 g of pods over its short season, while a well-tended pole bean plant can produce two to three times that across a much longer cropping window. As a planning guide, a 3-metre row of bush beans typically gives 1.5–2.5 kg, and the same length of pole beans, picked regularly, can return double that. Sowing a second short row a few weeks after the first keeps fresh beans coming rather than arriving all at once.
Storing and preserving beans
Beans keep well by several methods depending on type, so a glut need never be wasted. Fresh snap beans hold for about a week in the refrigerator, but freezing, canning, and drying all extend the harvest for months. Choosing the right method for the bean — fresh pods for freezing, mature seed for drying — gives the best results.
Storage and preservation methods
To preserve a surplus of beans, match the technique to the bean's stage and your kitchen.
- Refrigerate fresh snap beans unwashed in a perforated bag for up to a week.
- Freeze snap beans after blanching for 2–3 minutes, cooling, and draining — they keep up to a year.
- Can beans using a pressure canner, the only safe method for this low-acid vegetable.
- Dry shell beans on the plant or indoors until the seeds are rock-hard, then store airtight in a cool, dark place where they last for years.
Collecting and saving seed for sowing
Saving your own bean seed is easy because beans are largely self-pollinating, so a modest isolation distance between varieties keeps them true to type. Leave the best, healthiest pods to dry fully on the plant, shell out the seeds, dry them further indoors, and store them in a labelled airtight jar in a cool place where they stay viable for three to four years. Organisations such as Seed Savers Exchange maintain hundreds of heirloom bean varieties this way, including Calypso, Jacob's Cattle, and Tiger's Eye, preserving genetic diversity that commercial catalogues drop.
Cooking and recipes with beans
Beans move from garden to table with little fuss, and the cooking method follows the bean type. Tender snap beans need only a few minutes of steaming, boiling, or stir-frying to stay crisp and bright; purple varieties such as Royal Burgundy turn green as they cook. Fresh shell beans simmer for 20–30 minutes until creamy, while dry beans are soaked overnight, then simmered until soft for soups, stews, and salads. Because home-grown beans are picked at their peak, they reward simple treatment — a little oil, garlic, and salt is often all a fresh pod needs to follow these growing tips and let you enjoy the rewards of your crop.